
Before you build your app, you’ll need to decide how you’re going to launch it to its audience.
There are lots of different routes to market for an app. Which option(s) you choose should take into account:
- Operating system: iOS, Android, web, perhaps on Mac or Windows, or cross-platform?
- Audience: Is the app for the public, for private internal use, or for private use by another organisation?
- Soft launch or full launch: Will you test a beta version of the app before launching officially?
This guide will take you through app launch options that cover every combination of these factors. We’ll start with iOS launch options, before moving on to methods of launching Android apps.
But first, we want to talk briefly about the importance of prototyping and beta-testing.
MVP: The first working version of your app
 Ahead of your app launch – whether that’s a soft launch or a full one – it’s a good idea to make sure the core concept of the app actually works.
To do this, we create what’s known in app lingo as the MVP, or ‘minimum viable product’. The MVP is a bare-bones version of the app which demonstrates the features that define the app’s purpose. It should prove the viability of any technical complexities of the app, and of its integrations, e.g. with payment providers or API integrations.
Before you attempt to launch your app, get your development team to create an MVP, and test the MVP’s functionality with a small audience of trusted insiders. When you have a working MVP, you can progress confidently to the launchpad…
Beta is often better for initial launch
After an app has successfully completed testing, you’ll probably be keen to launch to a wider audience of real users.
Many app owners take the cautious approach of starting with a soft launch, where a ‘beta version’ of the app is marketed to a relatively small (and often friendly) audience.
A public beta (or a private beta with a decently-sized testing cohort) should be somewhere between a prototype and perfection. The app will be able to deliver its core functionality – but you’ll still be flexible about making significant changes in response to audience feedback and performance measurements.
Soft-launching in beta has multiple benefits. Users are aware that the beta is essentially a test version of the app, and this encourages a generous response to any initial bugs or errors. And for the app owner, there’s opportunity to gather feedback that can be factored into the first market-ready version of the app.
Two key options for launching an app in beta are Apple TestFlight (iOS) and Google Play open beta testing (Android). We’ll discuss these options and link to further info from the iOS and Android sections of this guide, respectively.
iOS app launch options
Apple Developer Program
The Apple Developer Program is the gateway to launch for most iOS apps.
This Program is used for three common types of iOS app distribution: TestFlight Beta Testing, full launch in the App Store, and distribution of enterprise apps to specific organisations. It costs $99 per year to enrol with the Apple Developer Program and access its distribution options.
Launch in beta via TestFlight
TestFlight Beta Testing lets you invite an audience of up to 10,000 external users to try your app before its full launch. You can invite these beta users via email or a public link. Also, up to 100 members of your team can participate as internal testers, with individual roles and permissions.
TestFlight provides ways for beta users to send you feedback, which could help shape the final release version of the app. All users need to install the TestFlight app from Apple, in order to take part in the beta, which can be a slight barrier to access for less technical users.
Public listing on Apple’s App Store
This is the option for listing your app fully and publicly in the Apple App Store.
 In a nutshell, the process involves building your app using Apple’s specified methods, optimising for the latest iOS version, testing the app, and finally submitting it for review. Once accepted, the app can go live in the App Store, ready for customers to download. It’s worth bearing in mind that there is some risk of delays during Apple’s process for app review and acceptance. The risk can be mitigated by working with an experienced developer or agency.
Before publishing to the App Store, be sure to put together an optimised description of your app, along with a list of highly relevant keywords and other metadata. This will help the right users to find the app via App Store search.
Custom Apps
There are various ways to deploy a custom iOS app to a specific organisation while retaining control and IP rights to the software. Key touchpoints include App Store Connect, Apple Business Manager and Apple School Manager.
Using App Store Connect, you can make your app available to chosen organisations through their Apple Business Manager or Apple School Manager account. Whether the app is free to download or comes at a price is up to you.
This method can be used either for distributing apps to other organisations, or for launching your own apps internally, without the need to use third-party Mobile Distribution Management (MDM) services
Apple Developer Enterprise Program
The Apple Developer Enterprise Program is a platform for large companies or organisations to launch their own iOS apps for internal use. It’s a great option for app owners who want to distribute an app to their employees in a private and secure way that’s not perfectly covered by the regular Apple Developer Program.
Do bear in mind that your intranet may need to be equipped with a third-party service, such as an MDM solution or module, in order to facilitate this type of distribution on iOS.
Apple limits who can use its Developer Enterprise Program. In order to qualify, you must be a registered company/organisation with 100+ employees, and your app(s) must be for internal use only. Membership of the Program costs $299 per year.
Android app launch options
Open beta testing via Play Console
Google Play’s platform for developers, Play Console, lets you launch an open beta test version of your app via the Google Play store. Anyone can download the app, try it out, and potentially give feedback that you can use to help develop your final release version.
In addition to open beta testing, Play Console gives you options to launch an app internally to up to 100 testers, or launch a closed beta version to a small audience of invited users.
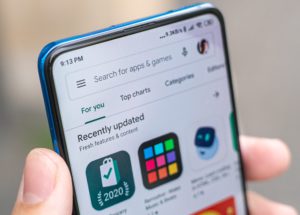
Android launch via Google Play
Google Play is the key Android app store, providing the biggest shop window in the industry to sell your app to the public. As well as enabling you to fully launching apps to the public, Google Play lets you launch small-scale tests to selected audiences – a handy advantage over iOS, which requires users to install the separate ‘Test Flight’ app in order to do effectively the same thing.
Before you publish your app to Google Play, you’ll need to configure and test the app according to Google’s specifications. You can then upload the app, along with metadata that will be published in the Google Play listing. Google Play then reviews the app, and finally makes it available for users to download.
Android launch via alternative marketplaces

If you’re launching an Android app to the public, you have plenty of other marketplaces to choose from besides the Google Play store. Other popular Android app stores include Amazon Apps, Huawei AppGallery, Aptoide and GetJar.
You can upload your Android app to as many marketplaces as you like, which will be a great help if you wish to launch your app to users outside of the Apple and Google ecosystems, e.g. those using Amazon Fire devices or Huawei devices.
Listing your app on multiple app stores can help you to cast a wide net for potential users – but don’t spread yourself too thin, as getting a high volume of downloads and ratings on Google Play will probably be your top priority.
Android launch via your own website
Android gives you the option to launch your app via your own website or server, without needing to upload it to the Google Play Store (or any other marketplace) – an approach known as ‘sideloading’.
Although sideloading can be used for any audience, it’s especially relevant for internal app distribution within your own company or organisation.
Other options to distribute your app include via email attachment, using an embedded ‘Install Now’ button feature of your email client; or simply sharing the app using any other form of file sharing/social media platform.
App Updates – post launch
Every app will need to be updated occasionally – perhaps frequently – after its launch. This can be a major time sink and a potential development bottleneck for app owners and developers. Not only do you need to rewrite the code for the app; you also have to redeploy the app to Google Play and/or the Apple App Store, triggering a store-side review process that can take days or weeks to complete. In a sense, you’re relaunching the app with every update.
It’s sometimes possible to update an app without jumping through all of the app stores’ hoops, by using CodePush by Microsoft. It’s a tool for updating your app across both Google Play and Apple’s App Store, without having to take any actions on those platforms. CodePush leverages React Native to update the JavaScript portion of your app code (but not the native code).
In a nutshell, CodePush could enable you to avoid formally redeploy code to each app store when making certain updates to your app. If you’re distributing the app publicly via one or more marketplaces, it makes sense to make updates via CodePush whenever that’s possible.
Some app users turn off automatic app updates in the app store. One potential benefit of using CodePush, is that it can push through the updates to those users, ensuring the app continues to function as you want it to. Further, you can configure your app so that it can’t be used unless it has pulled the latest CodePush update.
Having said all that, It’s also worth noting that using CodePush might not be an option for very long. Apple and Google both currently permit limited uses of CodePush by developers using their respective OS, but either company could potentially block the tool’s use at any moment. Both are certainly opposed to app owners using CodePush to make wholesale changes to their iOS and Android apps.
Don’t launch until you’re properly prepared
By now you will hopefully have identified one or more suitable options for launching your app.
Before you hit ‘Publish’, just be sure that you’ve done everything you can to prepare for a successful launch.

For public apps, it’s often a good idea to communicate with potential users before the app launches. Consider setting up a simple landing page to capture prospective users’ email addresses. This can be done very quickly and easily using a service such as Mailchimp or Launchrock. Or, you might commission your development team to create a bespoke landing page that does the same job.
You should also spend a good amount of time preparing the metadata that will accompany your app wherever it’s listed – from the keywords people might use to find it, to the description that accompanies the app on the listing page.
For more on how to get your app ready for launch, read our short guide to app preoptimisation.